
Your bum might look Fine with a capital F, but can it carry you through your day? Believe it or not, weak glutes contribute to knee, ankle, and lower back pain, so maintaining a firm backside is pretty crucial to your health and comfort.
A basic bridge exercise is an ideal way to strengthen and stabilize your glutes and the surrounding muscles. Plus, who doesn’t want quarter-bouncing buns?
It takes time and consistent effort to strengthen and tighten any muscle group. But that’s what we love about the bridge: It’s easy to add at the end of a workout just before you do your cooldown stretches.
Follow our step-by-step guide and toss in a few bridge variations to keep your muscles guessing. You’ll have buns of steel in no time.
You can do bridges on a mat or the floor, but your chosen surface should prevent your heels from slipping.
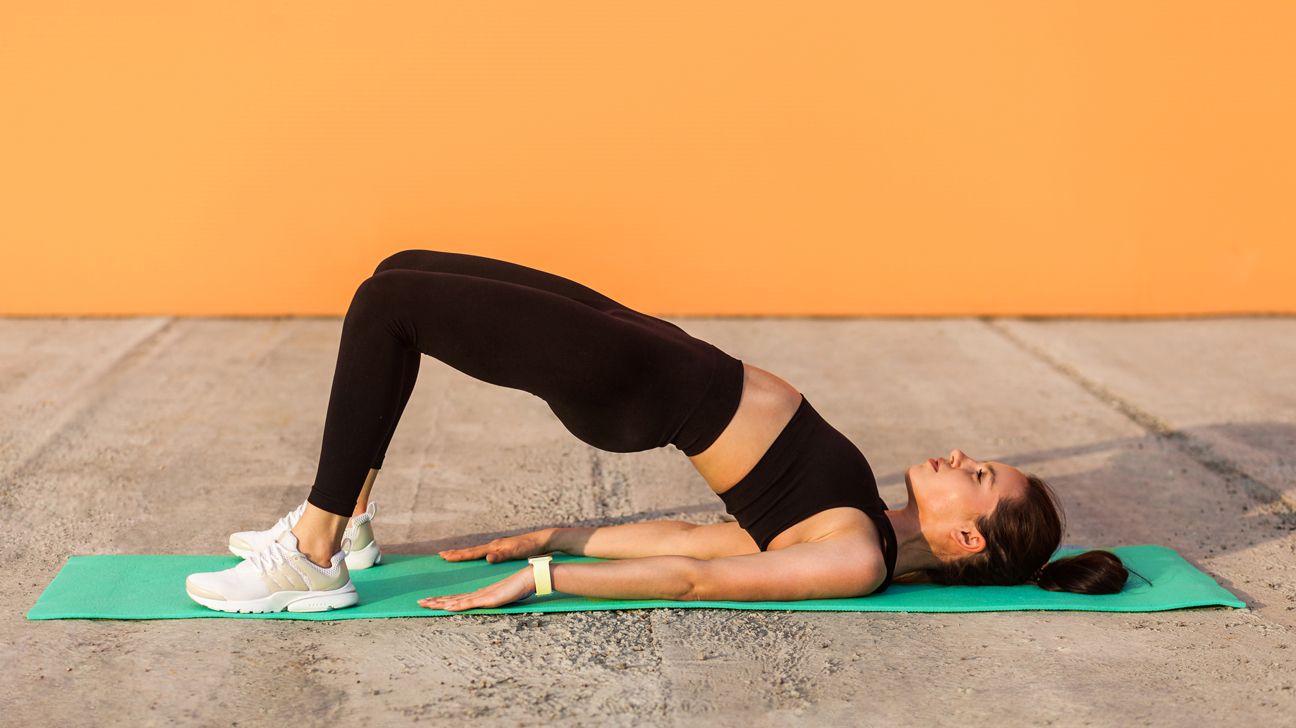
Lie on your back with arms at your sides and palms of hands against the floor. Bend knees and place feet hip-width apart, flat on the floor, creating a 90-degree angle.
Tighten lower back and abs as you flex your glutes (butt) and press your hips up. Press heels into the floor as you hold the bridge. Your body should form a straight line from shoulders to knees.
Release and slowly lower hips back to the floor.
Great, you may say to yourself, but how many bridges should I do?
You can do bridges in a couple of different ways. You can go for an isometric/static hold or do reps. If you opt to hold the bridge, hold it only as long as you can maintain proper form. That may only be 5–7 seconds at first. But with time, you can work up to a full minute.
Form is key when doing reps too. Do 3 sets of 12–15 reps, pausing for 1 or 2 seconds at the peak of each bridge.
Once you’ve got the basic form down, mix up your workout with one of these bridge variations:
Bridge with weights
Before starting your bridge, place a weight on your hips to add resistance. Be sure to hang on to the weight with your hands so it doesn’t fall off.
Bridge with bands
There are a couple of variations you can do with resistance bands.
For the first variation, place a loop or hip circle band just above your knees. As you raise your hips, the band adds resistance, requiring greater stabilization in your glutes, hips, and thighs.
The second variation can be done with a loop, hip circle, tube, or therapy resistance band. Place the band over your hips, holding it against the floor on both sides with your hands or wrists. Keep holding the band to the floor as you raise your hips. This variation adds resistance as you reach the peak of the bridge.
Bridge with ball (elevated bridge)
Place your heels hip-width apart on top of a stability ball. Press through your heels and lift your hips to a bridge position. This variation takes some serious stability, so be prepared.
Single-leg bridge (bridge with leg extended)
Place your feet hip-width apart. As you press through your heels to lift into bridge position, straighten one leg so the other leg holds the bridge on its own. Repeat on the other side.
There are other bridge variations that don’t require extra equipment. For example, you can turn your toes and knees out or do the bridge entirely on your toes.
The bridge exercise targets your glutes, hamstrings, and abs. It’s an excellent exercise to build stability through your hips and core too. These muscles easily get weak from disuse, like when you sit at a desk all day.
Regularly doing a bridge or two can help keep your lower back strong, your posture perfect, and your butt toned.
- Start with your knees bent at a 90-degree angle.
- Raise your hips until you create a straight line from knees to shoulders.
- Maintain that straight line — overextending your hips can cause bowing in your lower back, which can do more harm than good.
- Engage your core for the entire exercise. You can do a bridge with lax abs, but you won’t get nearly the same benefits.
- Keep your glutes tight and hold knees directly over ankles.
- Knees and toes should point in the same direction.
- If you feel your form starting to wane, it’s time for a break.
- Maintain even pressure in your feet as you press into the bridge position.